Bougie on a Budget: How We Brought “Haunted Holler” to Life for First Friday
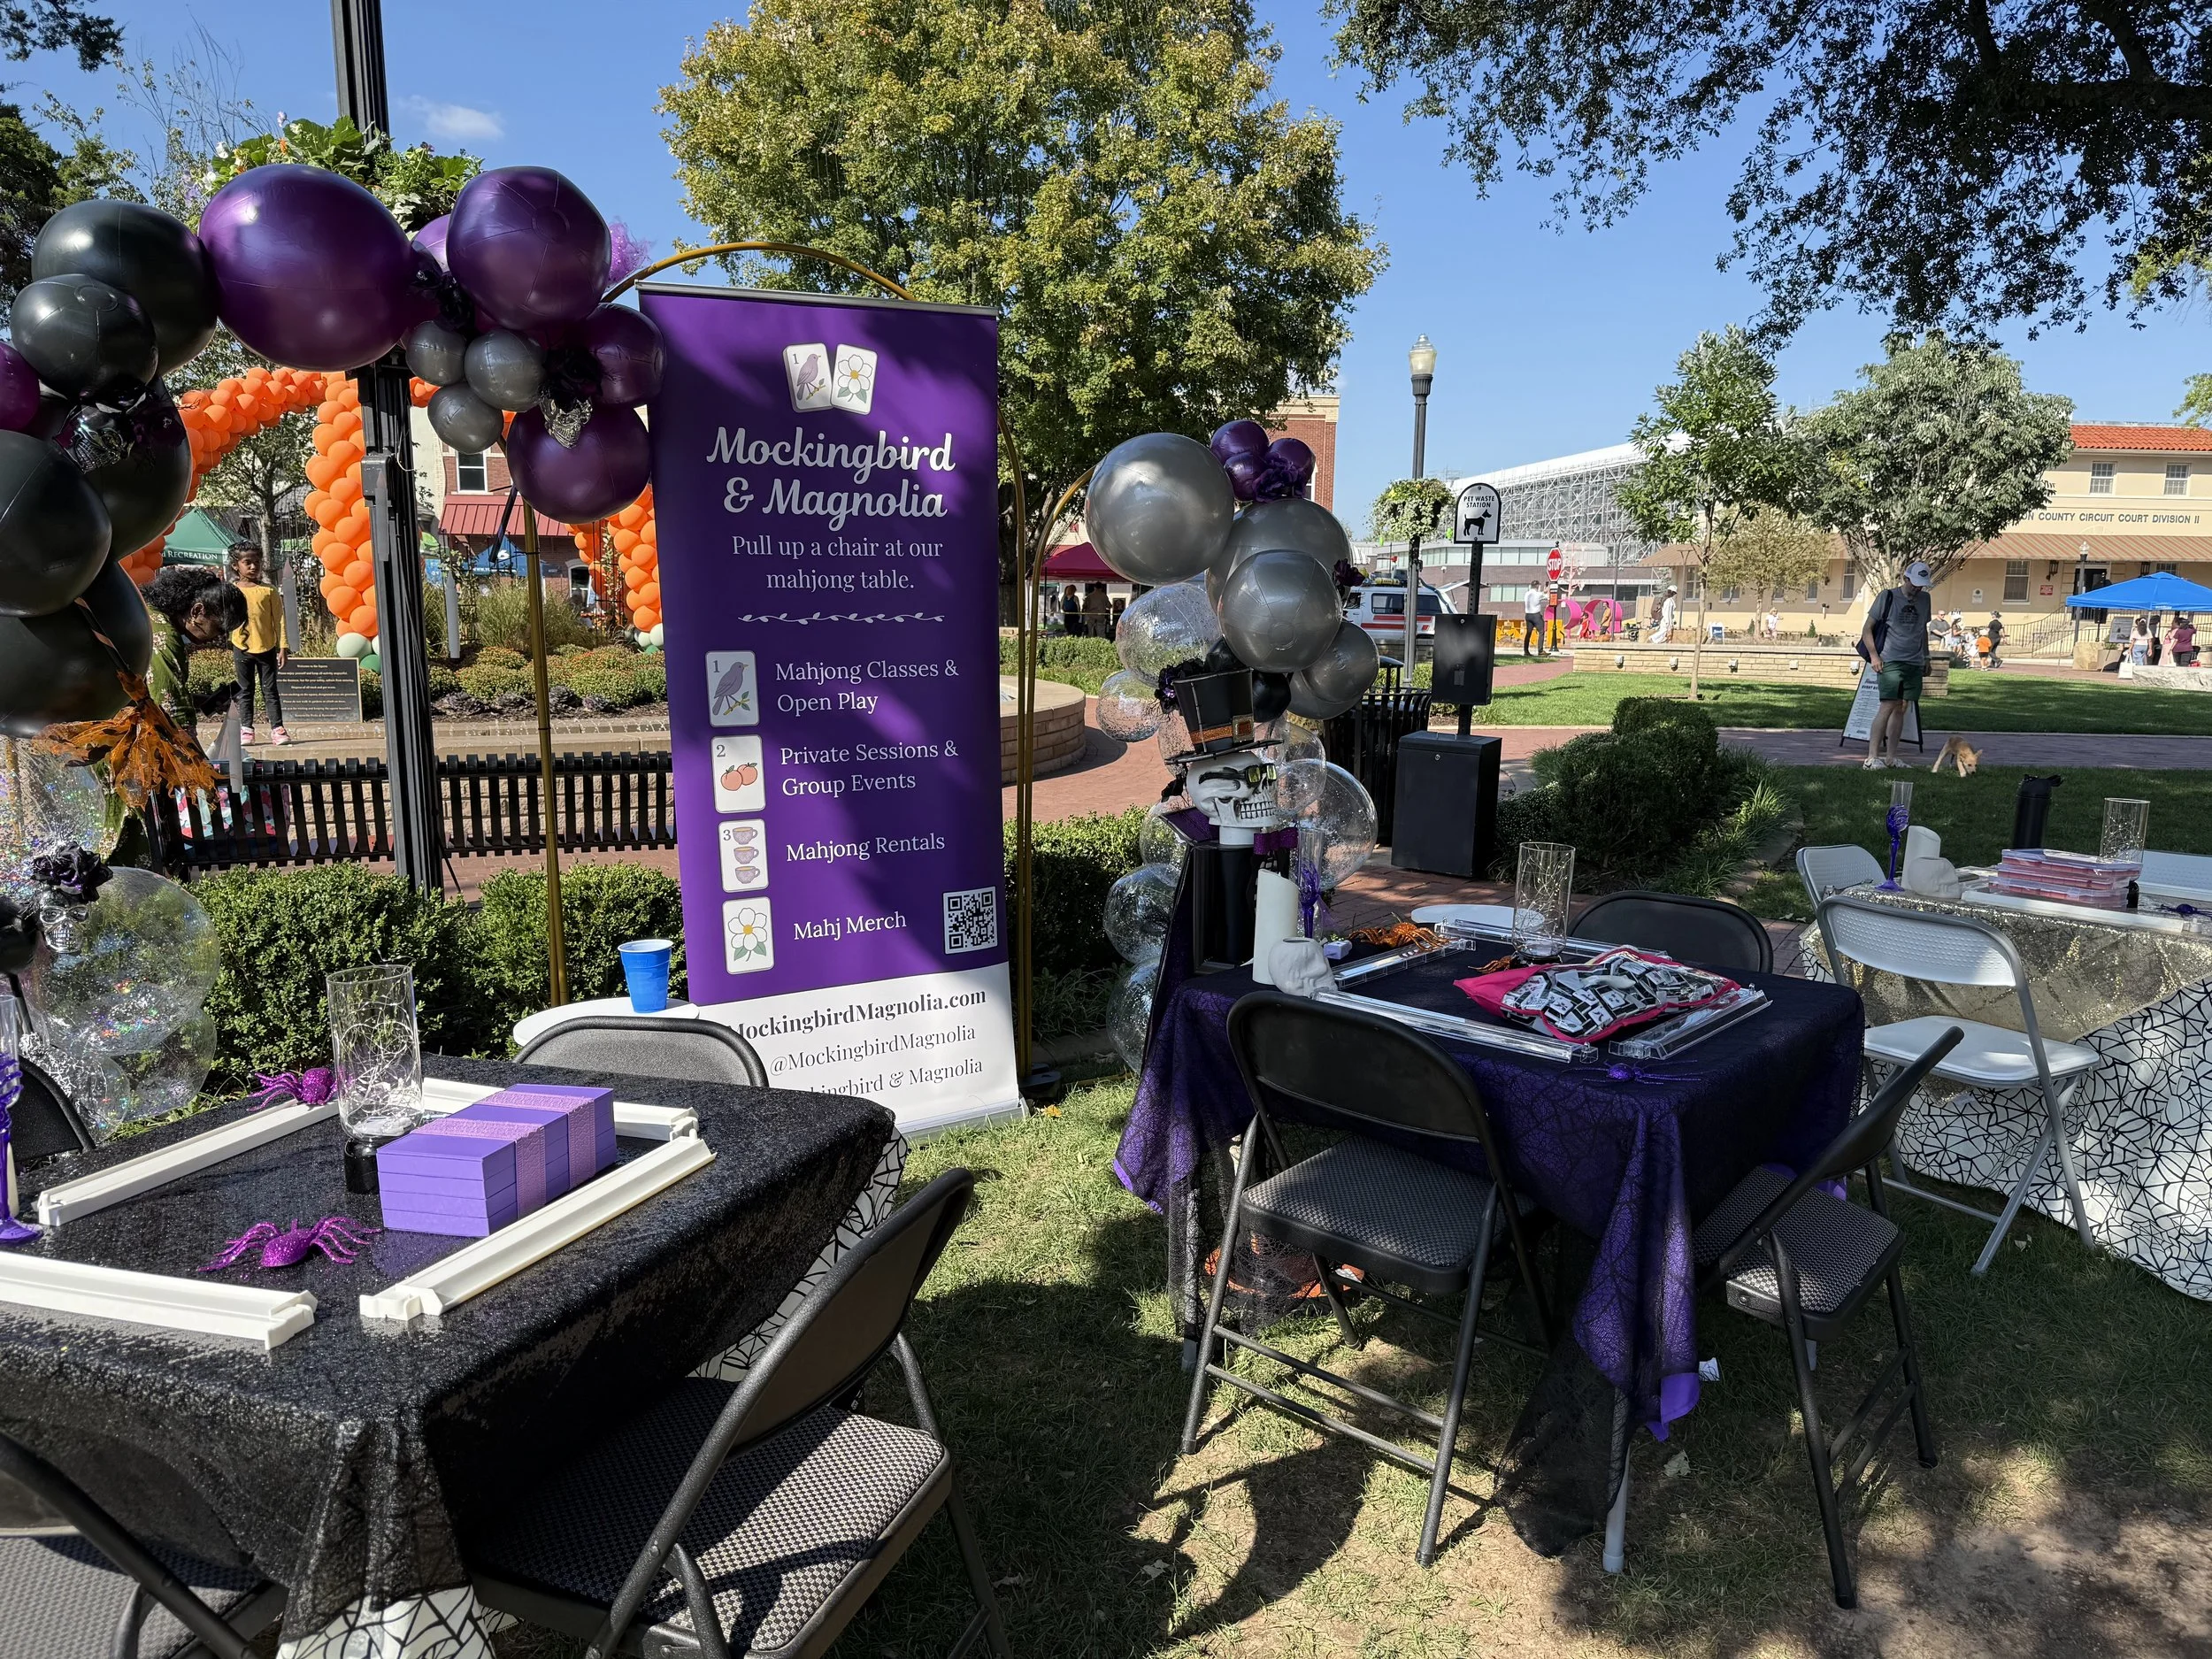
Our October First Friday Set-up
When we learned that we were approved for an activation at October’s First Friday in Downtown Bentonville, we immediately went into planning mode. Sydney and I both love a good theme, and this month’s Haunted Holler concept was right up our alley. We knew we wanted something playful, eye-catching, and just spooky enough to turn heads.
And judging by the comments that night—“Wow, that setup looks expensive!”—we’d say mission accomplished. But here’s the truth: our booth looked bougie without breaking the bank. We thought it’d be fun to pull back the curtain and share how we created the look on a budget, all while building out reusable basics for future Mahjong events.
Step 1: Borrow Before You Buy

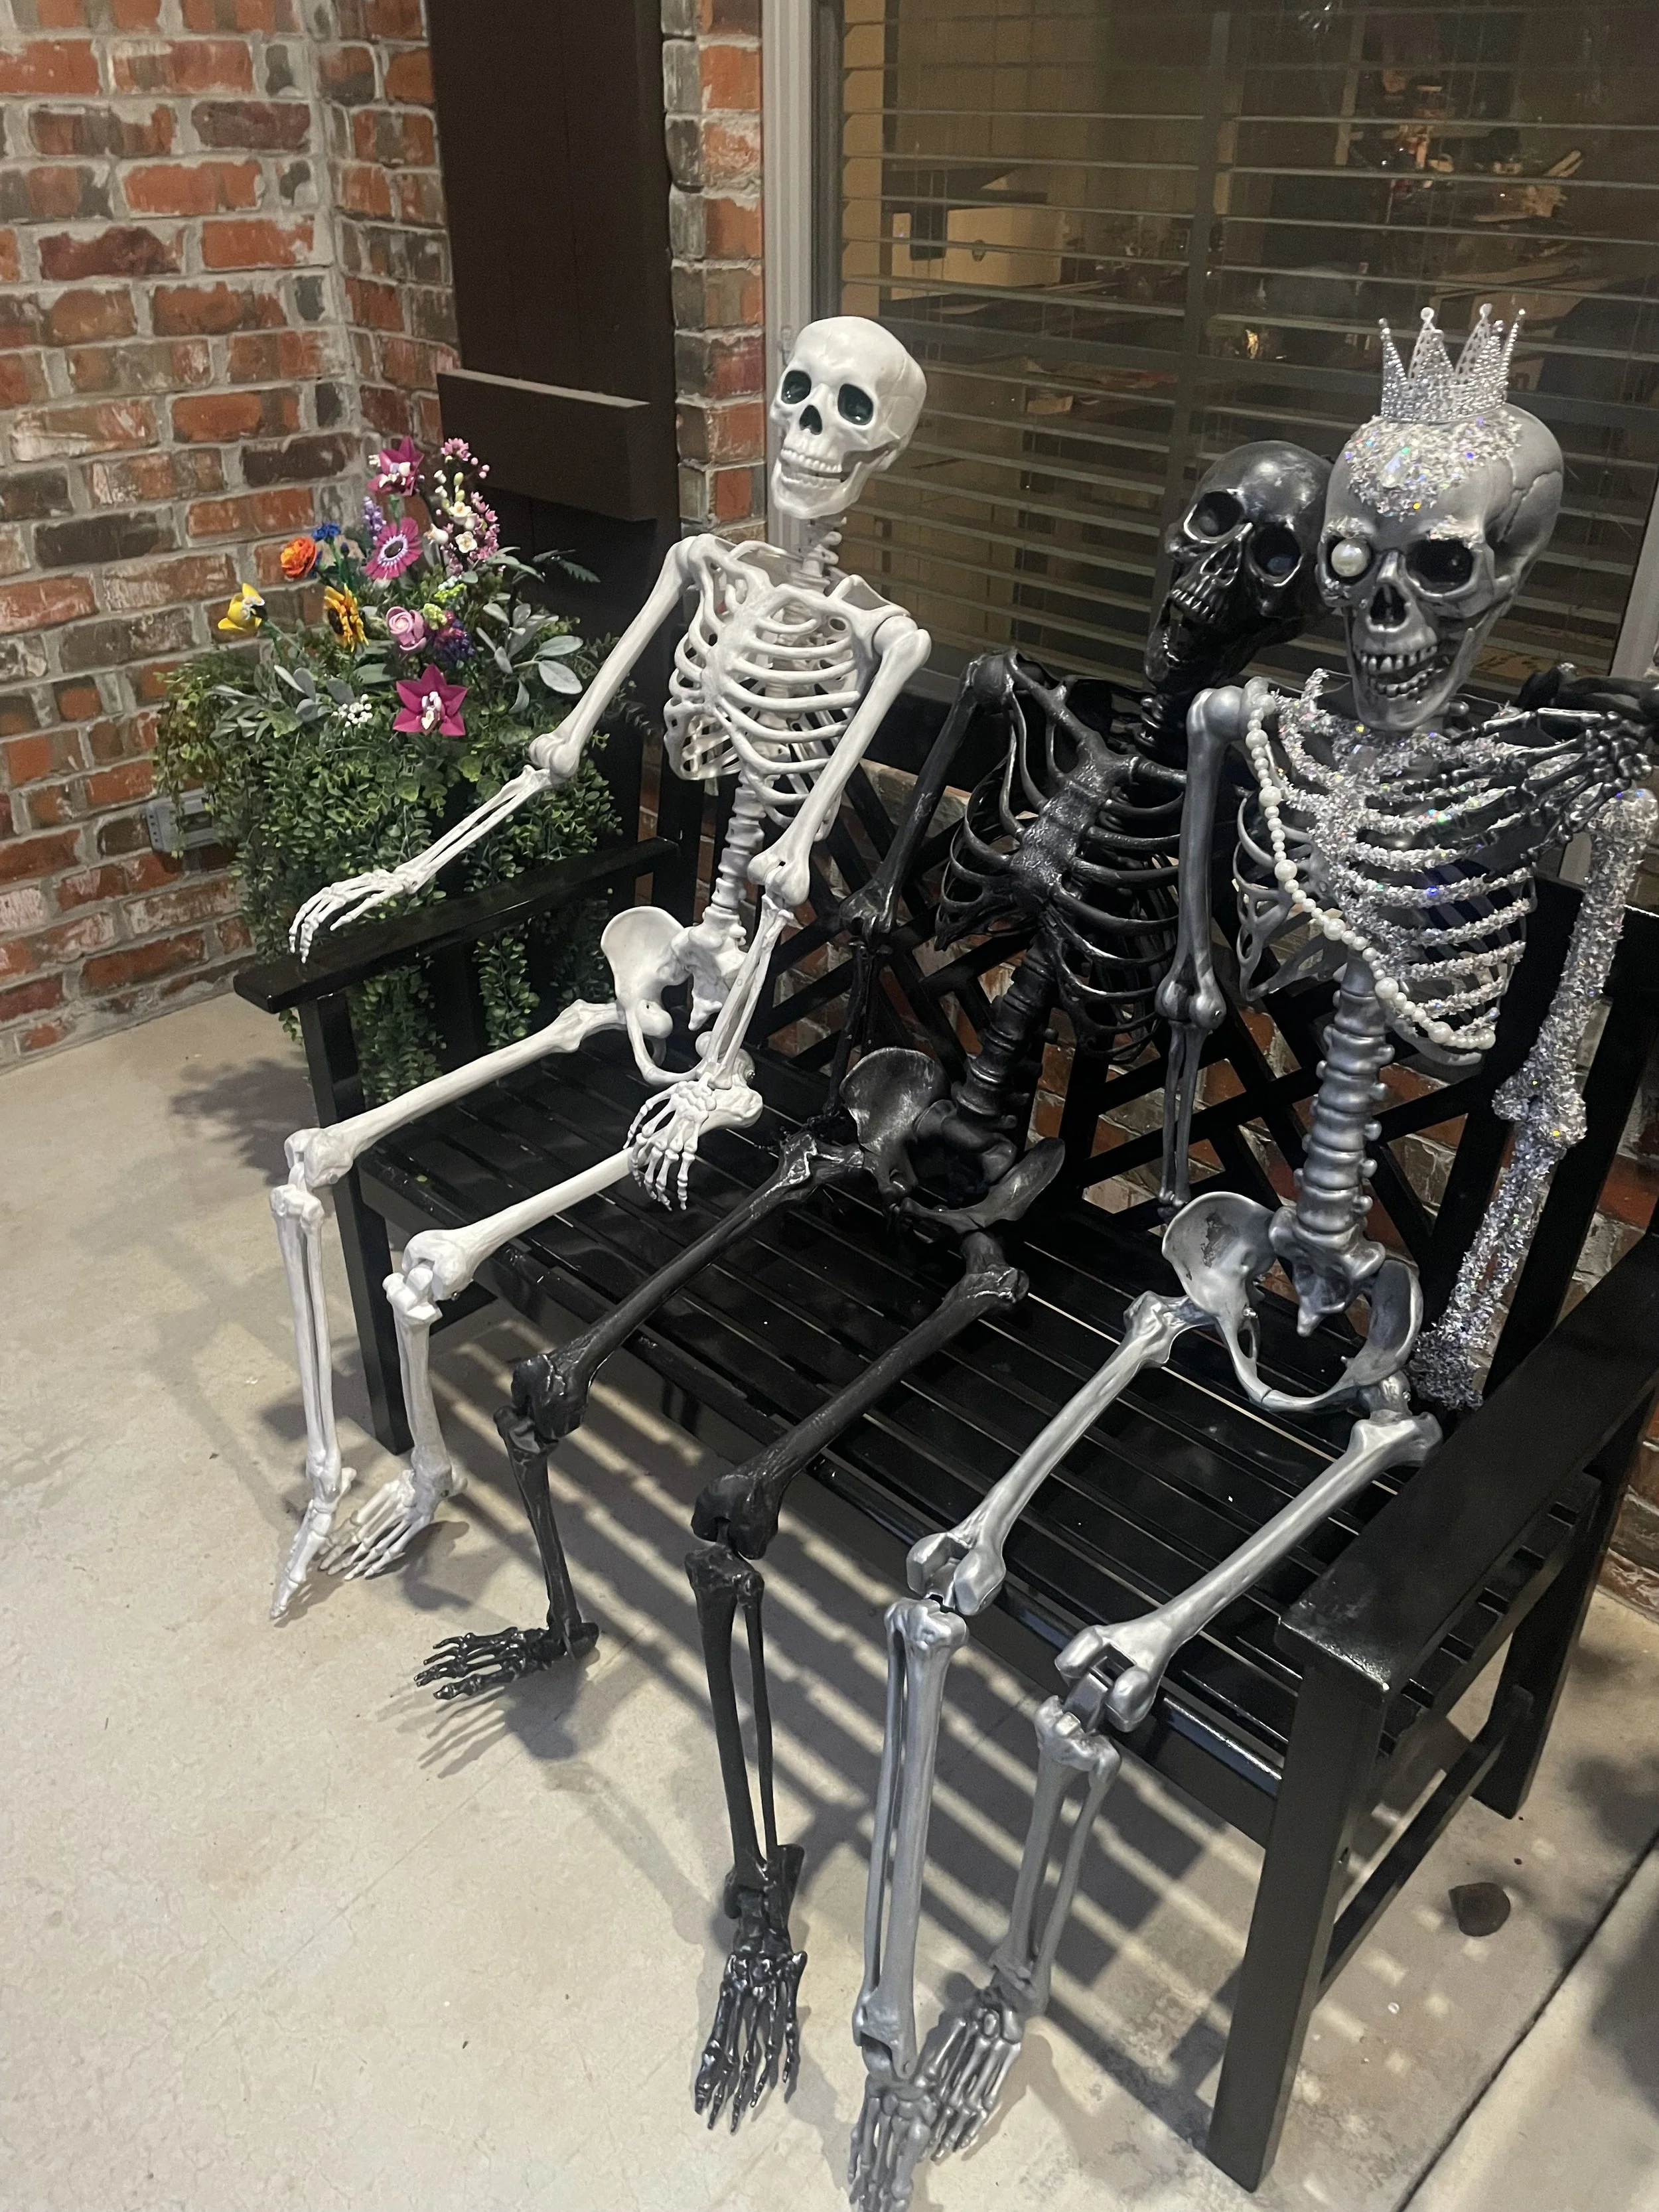
Our first idea? A “ghost at the table.” Sydney sent out a call to friends for anything that screamed bougie Halloween—and our community delivered. From a disco-inspired skeleton to a full-on gorilla costume, we had options galore.
Takeaway: before spending a dime, see what you can borrow. Friends’ attics and closets are treasure troves when you’re going for a theme!
Step 2: Find Affordable Foundations
Since our usual Mahjong mats weren’t a great fit for the outdoor setup, we started hunting for themed table coverings. Target came through with a lacy spiderweb overlay ($12) and an easy-wipe webbed tablecloth ($6). We decided not to cut them down to fit our card tables, keeping them versatile for future events.
Sydney also found glittery table toppers for $13 that added the perfect sparkle.
To keep things bright after dark, we added lighting that matched the spooky-chic vibe. We grabbed clear glass vases with black bases from Target ($3 each) and battery-operated fairy lights from Walmart.com ($5). Voilà—a web-themed lighting setup for just $17 per table that we can reuse all season long.

Some of our affordable foundations to set the Halloween scene
Step 3: Go Reusable with Your “Wow” Moment

Balloon arch inspiration for future events
We’ve always loved balloon arches, but one-and-done décor just isn’t sustainable (for our wallets or our storage closets). Cue the algorithm magic—Instagram showed us reusable inflatable balloons from Minnidip, and we were obsessed.
Think beach balls meets balloon art: each has a single inflation point and forms clusters when filled. We used:
All in, the reusable balloons cost around $170, plus an $56 outdoor arch frame from Amazon. Indoors, Minnidip recommend command hooks to attach to your walls, which would create a similar look without the arch!
We didn’t even use every balloon this time, which means we already have a gorgeous setup ready to go for our next class or private event.
Step 4: Add Dollar Tree Magic
To tie everything together, Sydney made a quick run to Dollar Tree, grabbing a mix of fall florals, witches’ brooms, floating candles, and tiny skeleton heads. For under $20, she wove them into the balloon arch, adding the perfect finishing touch of fall flair.
Step 5: The Final Tally
Our total investment for the “Haunted Holler” set-up came to about $200. This includes calculating cost-per-use* of the reusable balloons at roughly $14 per event.
Not only did it create a photo-worthy setup that drew people in, but it also gave us a great foundation for future events.
So as spooky season continues, take a page from our playbook: borrow from friends, mix in a few Dollar Tree finds, and invest in pieces that can make an encore appearance. A little creativity (and a lot of fairy lights) can make any gathering feel delightfully bougie on a budget.
*Cost-per-use calculated by cost of balloons used divided by the expected use of the same set-up at least 1x per month for 12 months.